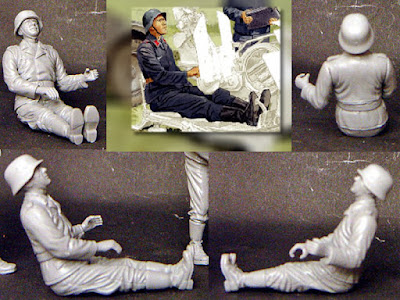
I'm currently working on a Stug III Ausf B for a group build on Tanks and Things and need a figure to fill the gunner's seat. The gunner's hatches will be closed, and the figure will most likely hardly be visible and when so only from the rear. So why bother? Well it's simple: what if someone looks inside?
In the old days, when modellers were modellers and plastic was scared, instead of spending hours, days, weeks, months complaining about the lack of the perfectly posed figure which one modeller would only ever need once, modellers would convert existing figures to suit their needs. So, taking it old school, that's what I'll be doing with this build.
I needed a seated figure, slightly hunched. No dramas, I had the DML 2cm Flak Crew stuck away in the depths of a wardrobe, which includes a gunner. Problem: the figure has a few 'issues'.
- The pose: the pose seems stiff (like he should be lying in Ducky's morgue), the legs are outstretched (the overzealous trouser folds exaggerate that point) and he's leaning back in the flak gun's seat.
- Attire: Oops, he's a Luftwaffe ground trooper, and we need a Panzer/SPG dude - for the uninformed the uniforms are different.
So the proposed changes are:
- Legs: chop off the knees, open the groin (he looks like he's clenching), file down the folds. Resculpt the knees and trouser folds. Change the trousers to Panzer trousers by blousing them at the ankle. Convert boots to short ammo style boots.
- Torso: shorten torso (partially because the boy is too tall for the AFV), angle forward at hips and stomach. Lean and twist slightly to side. Convert flieggerblusse to Panzer jacket.
- Arms: not sure on postions yet, but drill out sleeves and repostion hands.
- Head: Off with it! Head angled up. I'll use a Tamiya head which has sufficient detail, is angled to the left and wears a field cap which is more fitting for the inside of an AFV. The Tamiya head is noticably smaller though - if the figure is out of the vehicle - inside it shouldn't be obvious given viewing angles.
The green lines below represent the current positions, the red the intended.
I'll state up front at this point in time that I have many real life things going on the moment, so this conversion may take a while to be done. That said please check back often.
Also, this is the biggest conversion I've undertaken, so bear with me - good thing it'll be stuck inside the AFV, right?


No comments:
Post a Comment